
The validate cells in workbook instruction allows a user to check a cell range against a condition or multiple conditions. You can check your worksheet(s) with the following these steps:
Steps
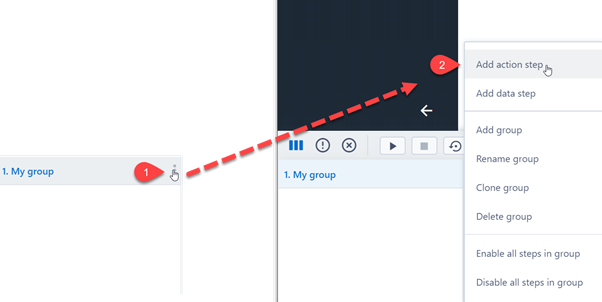
1. Create a new action step by clicking on three vertical dots (found to the right of the group's name) and then select "Add action step":
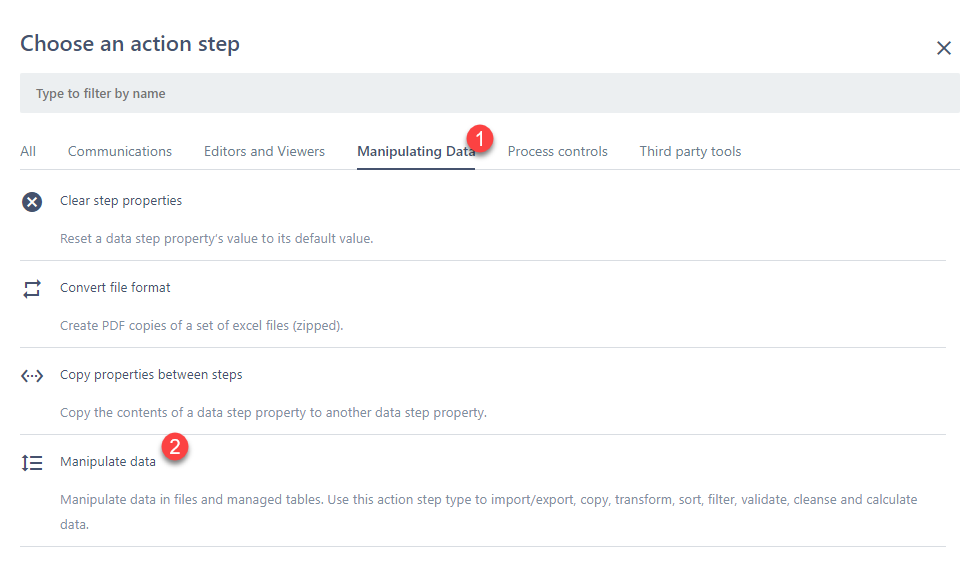
2. Under "Manipulating Data" select "Manipulate Data"
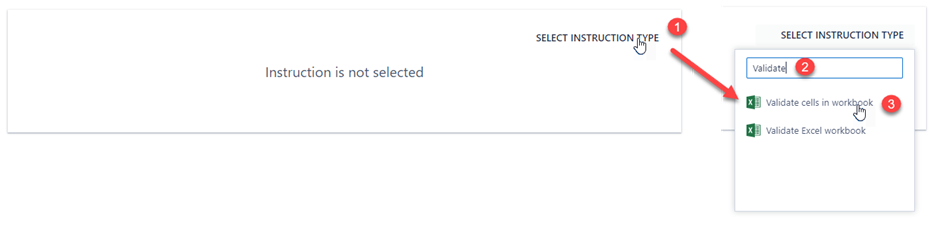
3. Click "Select Instruction Type" and search "Validate" and click the "Validate cells in workbook" to add the instruction.
4. Configure your step
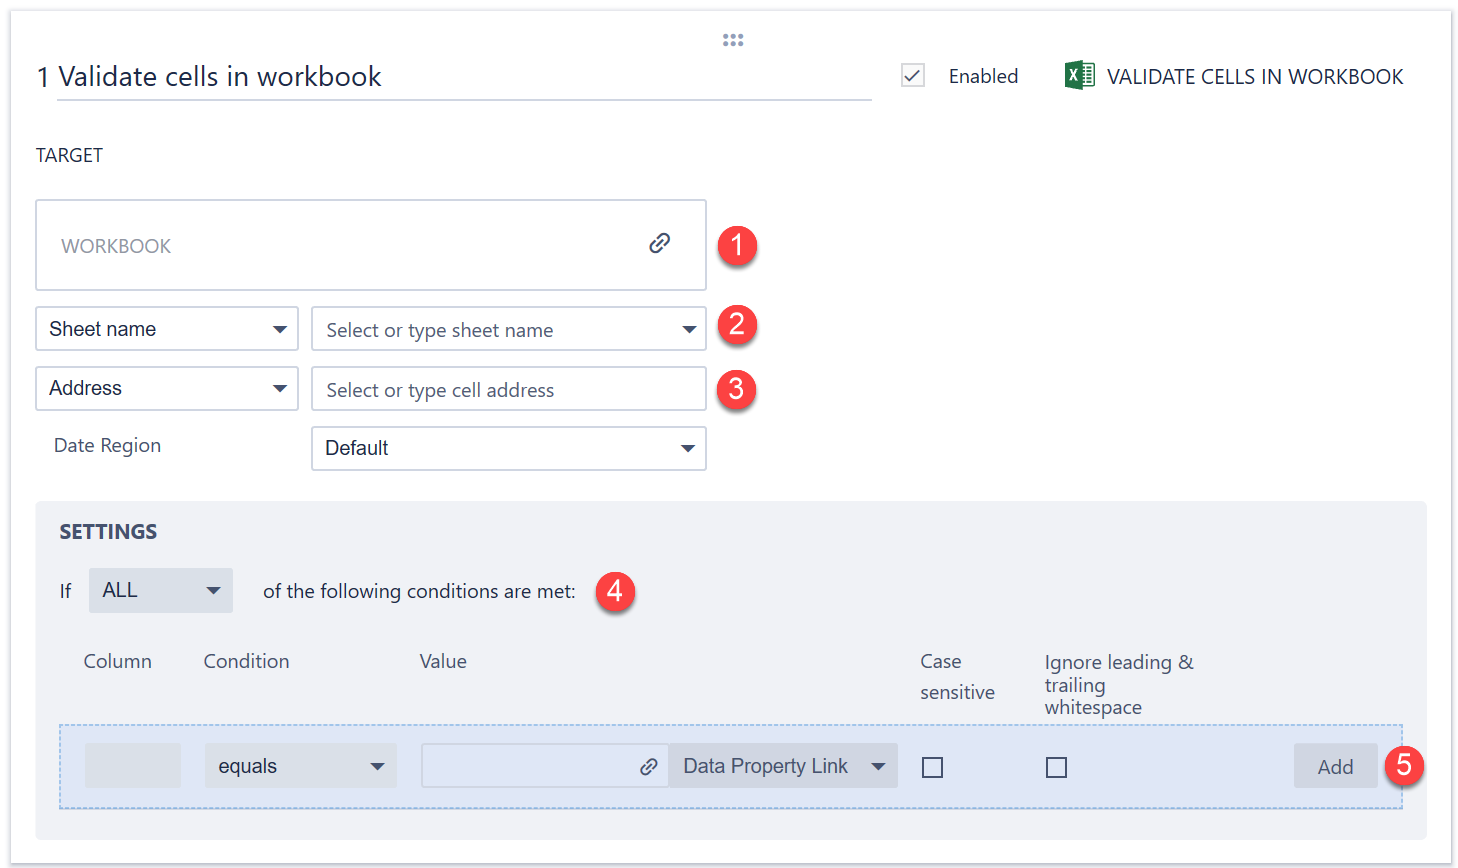
1) Link your workbook by clicking the  symbol.
2) Specify the sheet name or sheet index
3) Specify the cell range
4) Select whether you need:
- ALL conditions to be met; OR
- ANY (1 or more) conditions to be met.
5) Fill in the condition row and then click add. This can be done multiple times in order to add additional conditions.
a) Column: should specify the column in the worksheet that you wish to validate (e.g. column E)
b) Condition: Specify the type of operator that you wish to apply in the condition. Commonly used conditions may include equals, not equals, contains, starts with, greater than, less than, is number or is date.
c) Value: First select, on the dropdown to the right, whether you want to link to a Data step property (Data Property Link) or if you just want to type in a value (Literal). Then either link to the property or type in the condition.
d) Case sensitive: This option will determine whether the condition should ignore lower and upper case or not. E.g. with case sensitivity unticked the values "TRUE" and "true" will be interpreted as the same.
e) Ignore leading & trailing whitespace: This option will determine whether to ignore whitespaces when applying the condition to Excel cells. E.g. with this option ticked the following values will be interpreted as the same " test " and "test".
Comments
0 comments
Please sign in to leave a comment.