
The Decision Control Step allows the user to implement conditional step processing. In other words, the process will perform different action steps depending on whether a condition is met.
Note: this condition(s) must be a value(s) that is located in a cell inside an Excel spreadsheet.
This step is extremely useful when the user wishes to provide flexibility to the process flow, in order to allow different actions to be performed on different process runs. This step is very often used in conjunction with Step Dependencies for the desired process design.
In this article, we will first go through a brief introduction of how to create a typical decision control step and the function of each of the parameters. We will then go through a simple example of using a Decision Control Step to implement conditional processing in a process.
Creating the Step
1. Create an action step.
2. The following window will pop-up:
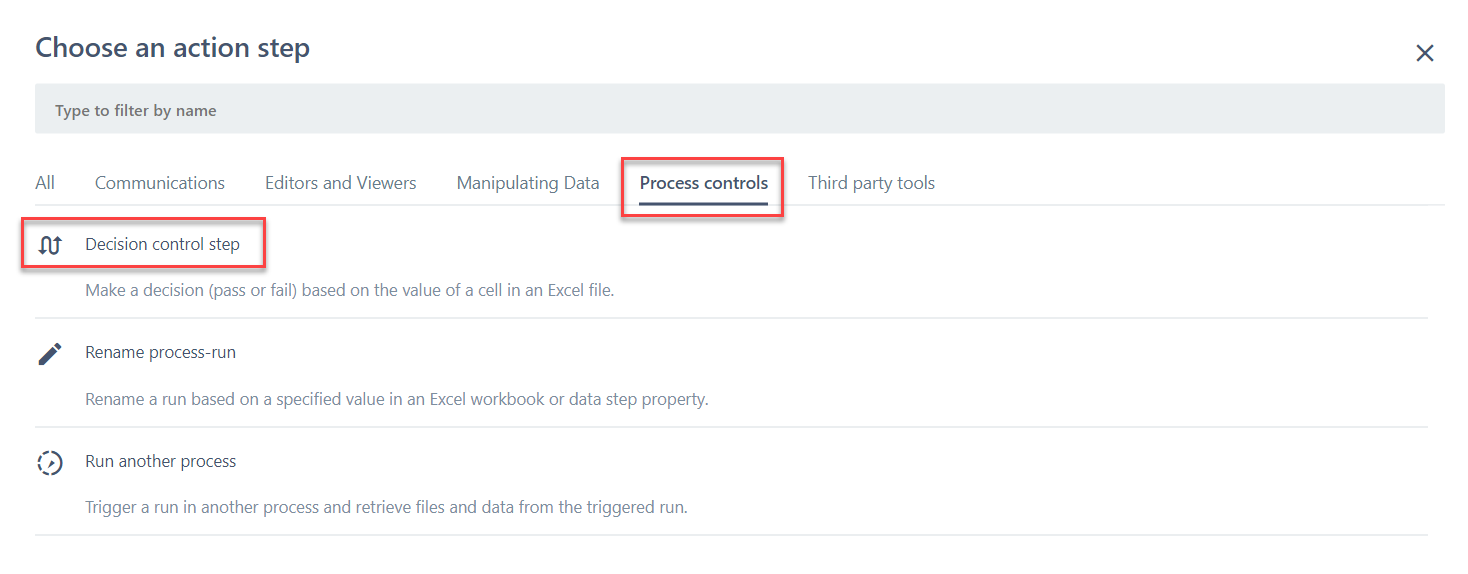
3. Select the "Process controls" tab and click "Decision control step", indicated above by the red boxes.
Using the Step
After creating a "Decision control step", you are ready to configure the step.
Link an Excel file
1. An Excel file will need to be uploaded that will contain the conditional value(s), on which the step will depend to determine the process flow.
2. Link an Excel file stored in a previous data step, by typing the file name into the linking box or clicking the link button on the right of the box.

Set a condition
At least one condition must be entered for the step to determine what the process should do next. These conditions are similar to a typical "IF" statement in a typical programming language.
For example, the below condition tests whether the value in cell A1 in worksheet "input" equals to the value "True".

1. Select the worksheet and cell to test in the condition.
2. Select the operator for the condition. Commonly used operators include, but not limited to:
- equals
- not equals
- contains
- not contains
- starts with
- ends with
- greater than
- less than.
3. Enter the value that is compared with the cell value. This can either be "Literal" or a "Data Property Link"
- You would use "Data Property Link" if the value is stored in a previous data step property (text box).
- You would use "Literal" if the value is typed in as a literal value and does not depend on a previous data step property.
4. There are also parameters such as whether the value should be case-sensitive (first checkbox) or if leading & trailing whitespace is to be ignored (second checkbox).
Note: The condition should be filled in the template row (the first row with the blue background colour) and remember to click "Add" after entering the condition.
Multiple conditions
You may also add more conditions if desired.
1. This can be done by filling in the template row (the first row with the blue background colour) following the same steps explained in the previous section.
2. Remember to click the "Add" button after entering the condition.
And/Or
The "Minimum number of conditions to pass" list allows the user to set how many of the conditions are to be met, in order for the "Decision control step" to "pass".
Put simply, set the number to be the total number of conditions in order to achieve a typical "AND" operator.
Whereas, set the number to be 1 in order to achieve a typical "OR" operator.
However, you may also choose any other number in between.
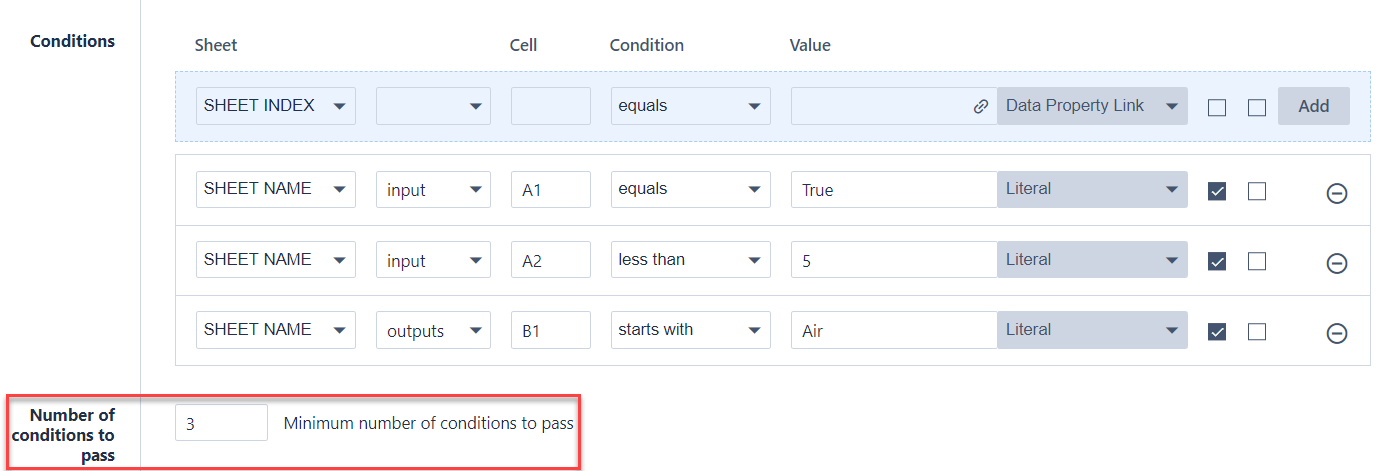
For example, in the example below, since the minimum number of conditions to pass has been set to 3, all 3 conditions (A1 in input equals "True", A2 in input is less than 5, B1 in outputs starts with "Air") must be met for the "Decision control step" to pass. This acts in the same way as an "AND" operator.
Outcome
The last section determines what the outcome of the step will be, depending on whether the conditions were met satisfactorily.
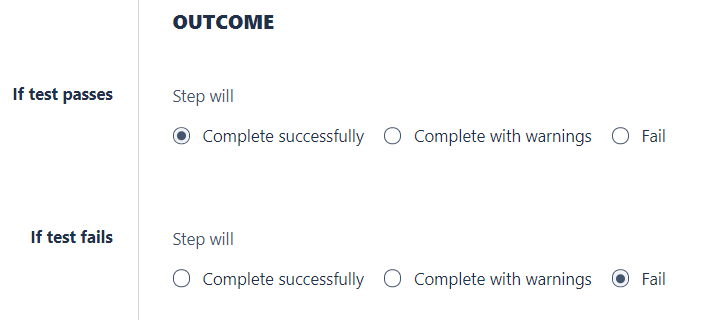
Usually, these parameters will be set so that the outcome "if the test passes" is set to "Complete successfully".
Whereas, the outcome "if the test fails" is set to "Fail".
This is useful as it allows the use of this "Decision control step" in conjunction with "Step Dependencies".
Example - Email if Validation Test Fails
One simple example where this step would be useful is if the inputs to a process is put through a header name validation test. If the headers or the format of the input files are unexpected and fails the validation test, an email will be sent to the user, indicating that this has happened.
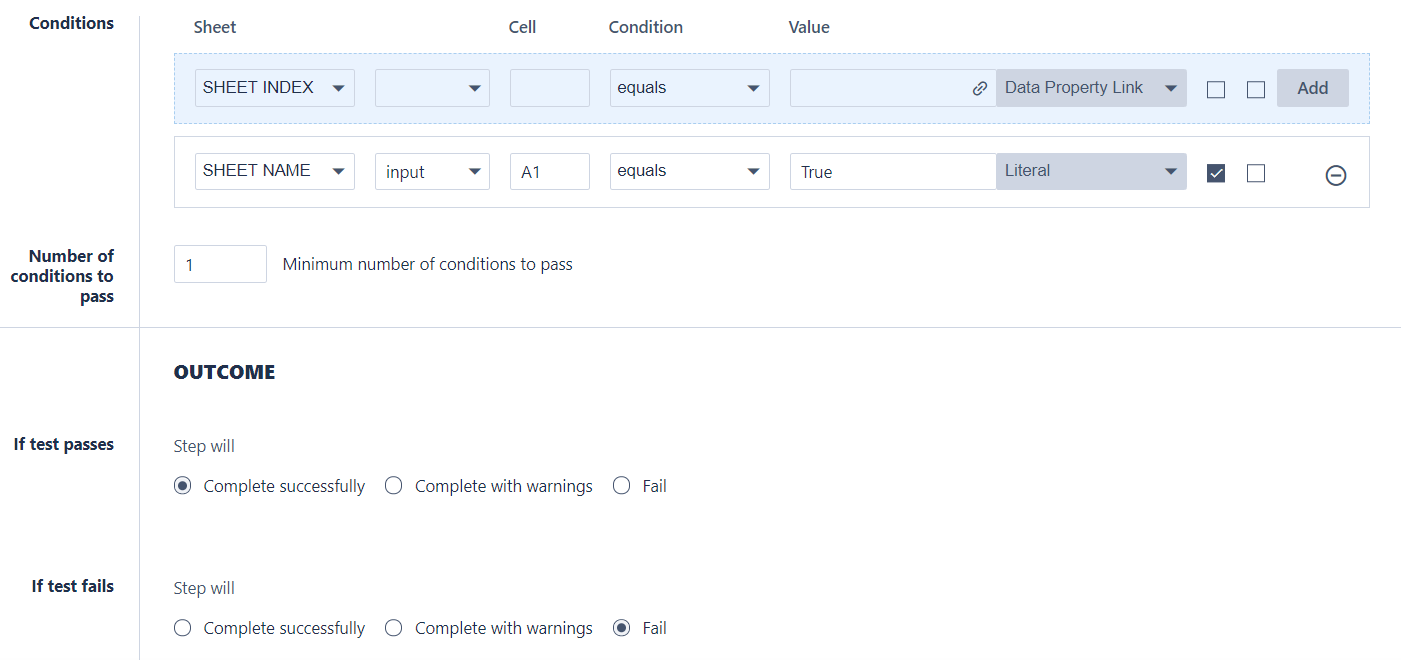
For simplicity and the purposes of this example, suppose that the input files are in the correct format if cell A1 in worksheet "input" is equal to "True"
1. Firstly, the "Decision Control Step" will be set according to the screenshot given below.
2. Next, a "Send an Email" action step is made.
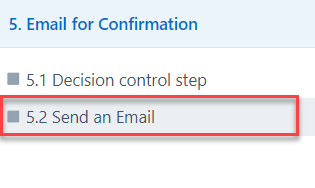
3. The "Step dependencies" on "Step 5.2 Send an Email" is set it to the following configuration:

This implies that the "Step 5.2 Send an Email" action step will only run if the "Decision control step" fails, that is, if the input file fails the header name validation test.
4. The process is then saved and run.
The process should now behave differently depending on the value in Cell A1 in "input" in the Excel file.

Comments
0 comments
Please sign in to leave a comment.