
There are times where you'd like to prevent future users from modifying/accessing/seeing the formulas in the cells in certain worksheets inside an Excel workbook.
This can be done by setting a password on appropriate worksheets.
The Alter worksheet protection step allows the user to automate the protecting/unprotecting of worksheets.
Note: do not confuse this step with the Alter workbook protection instruction which prevents future users from adding, deleting, moving, renaming, hiding sheets or unhiding hidden sheets, unless the correct password is supplied.
However, the Alter worksheet protection instruction (the subject of this article) prevents future users from changing the actual contents of a worksheet. Users can (in general) still modify the workbook structure (as long as the workbook structure protection settings haven't been changed).
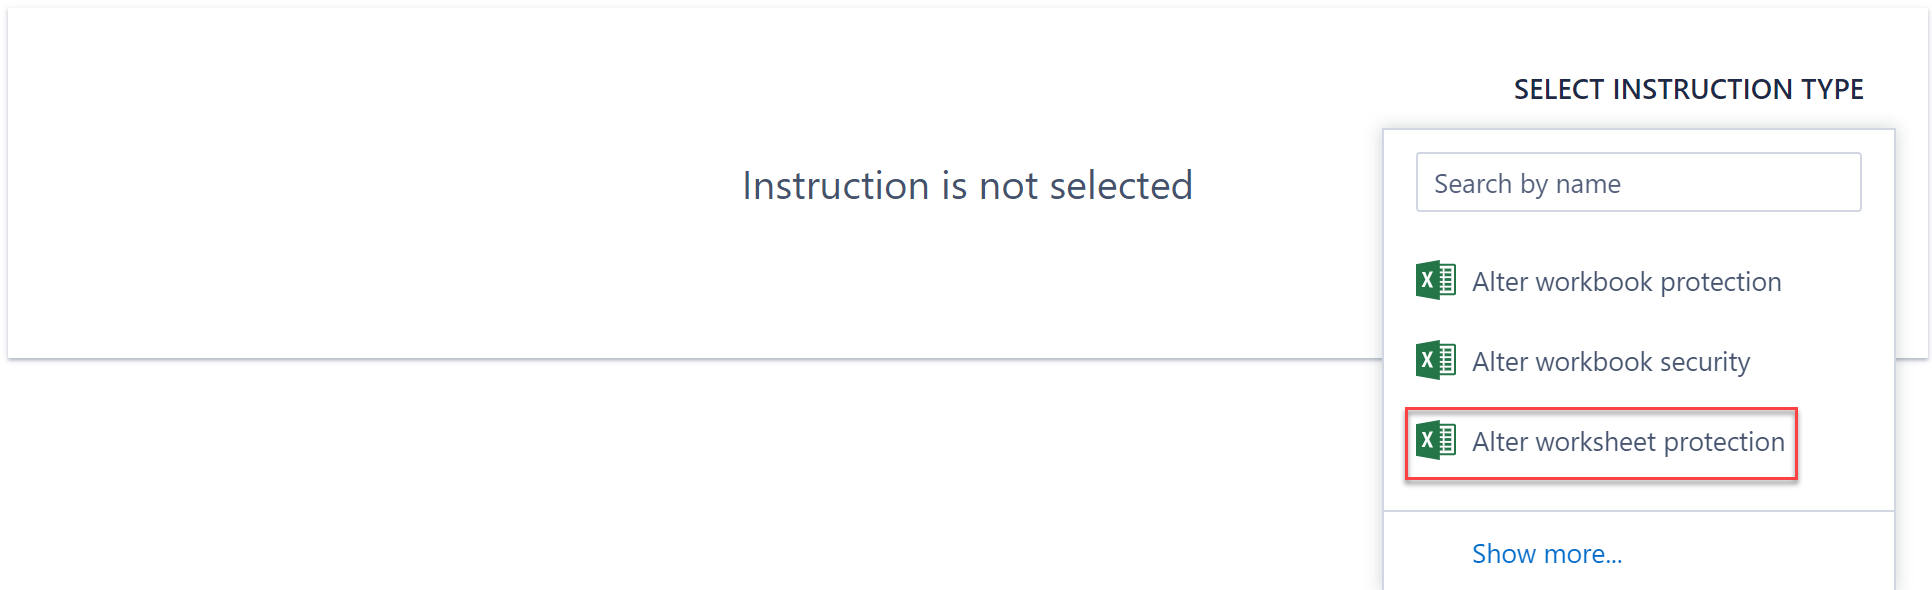
Creating the step
Firstly, create an action step to manipulate data and select "Alter worksheet protection" in the "Excel" section.
You will then be presented with the following form.
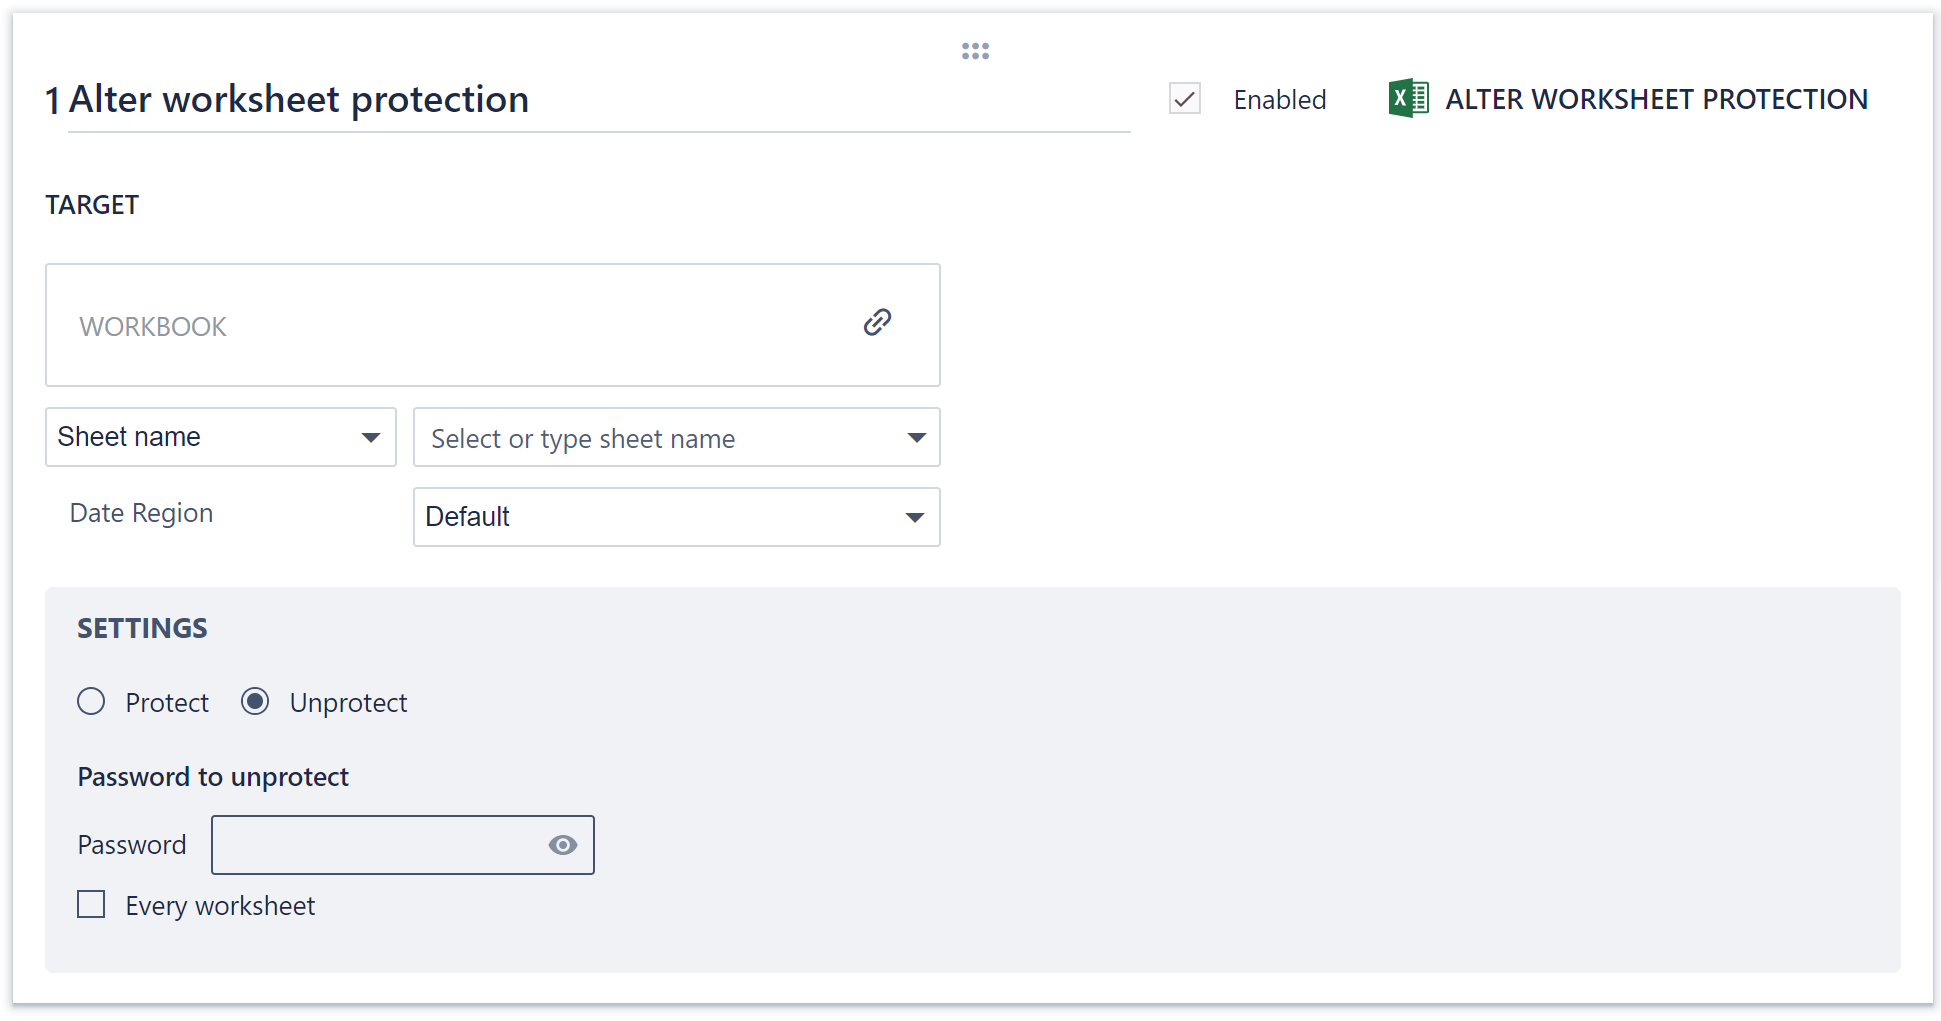
Firstly, you need to link the relevant Excel workbook and worksheet.
Next, if you want to unprotect an existing protected worksheet, then simply enter the correct password in the textbox.
Alternatively, if you want to protect or change the password on a worksheet, select the "Protect" option. You will then be able to enter the new password for the worksheet. There is also the option to enter the current password if the worksheet is protected.
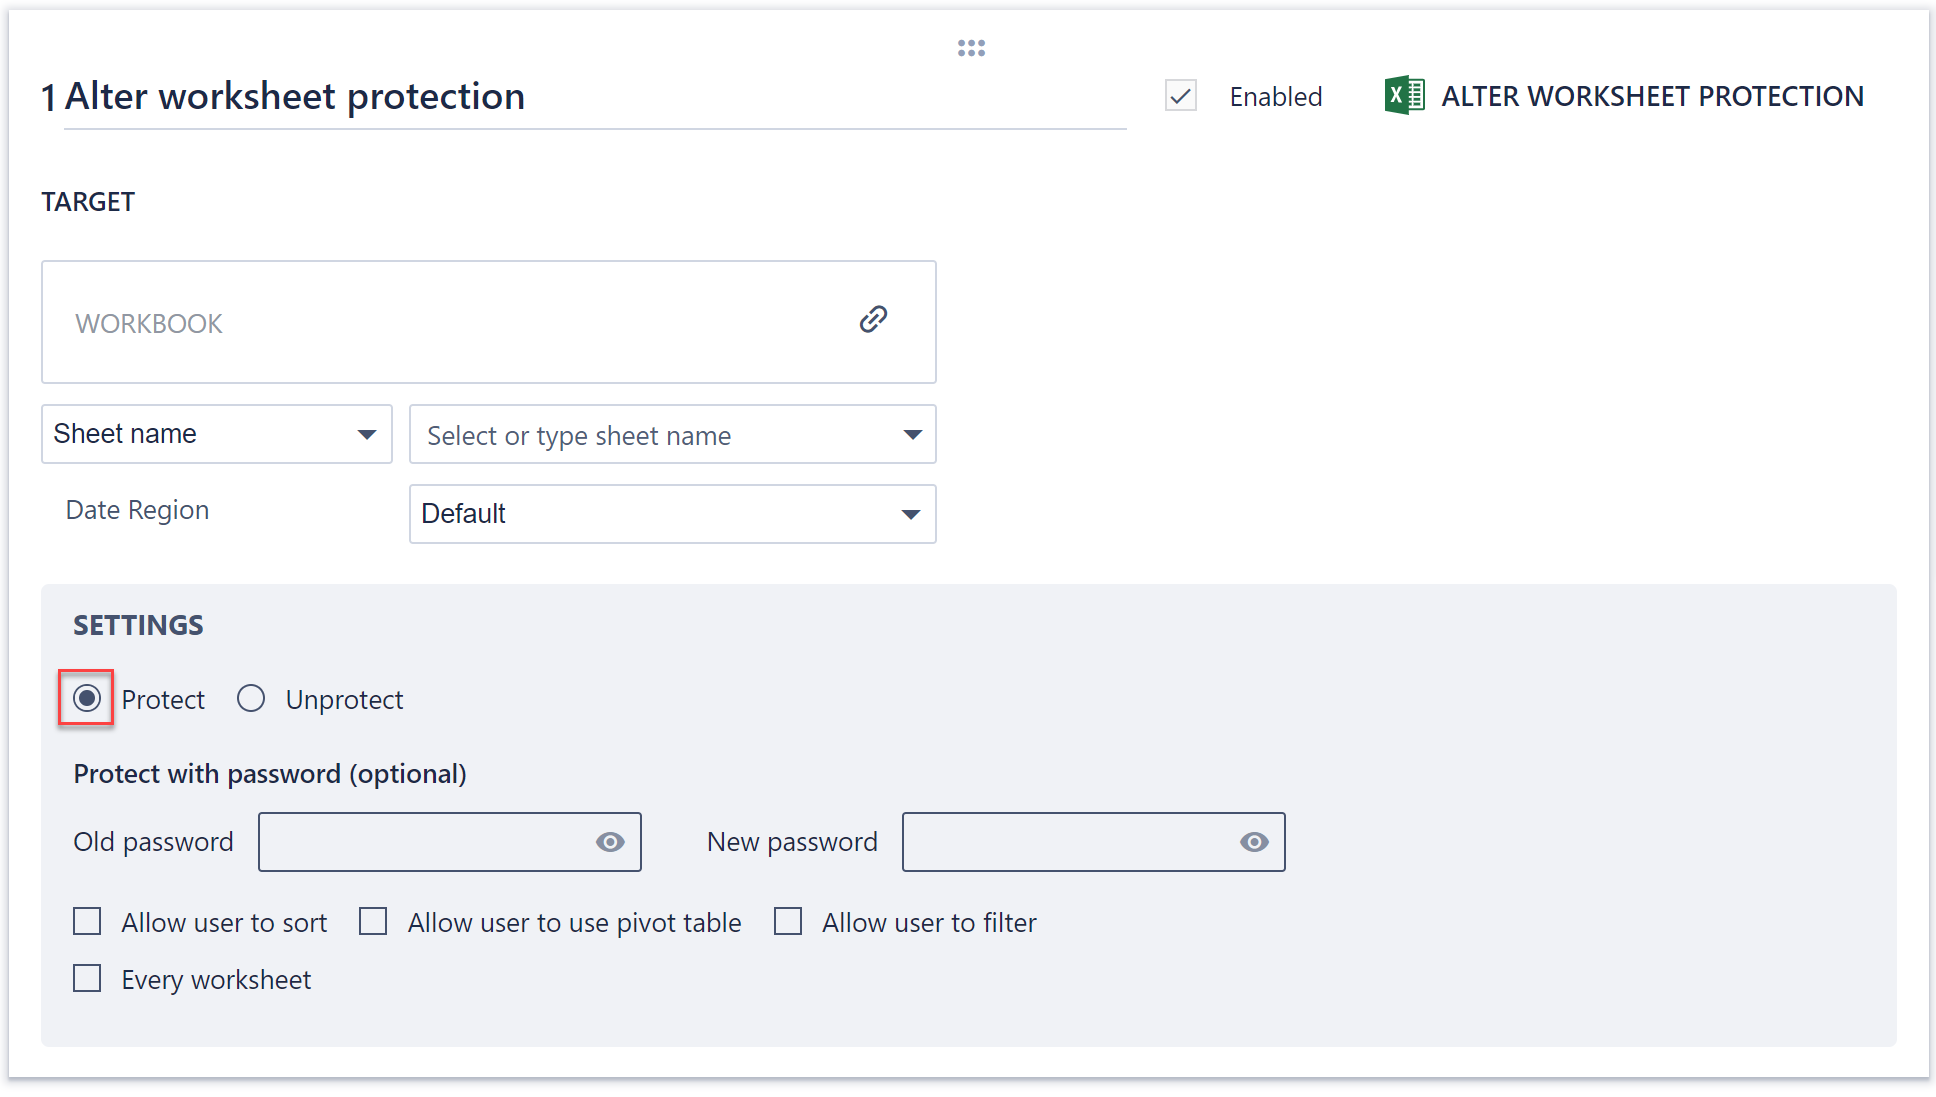
Note: there is an option to apply these protection changes to every worksheet in the workbook, provided in the checkbox at the bottom.
There is also further flexibility in terms of allowing users certain access to password-protected worksheets such as the ability to filter or sort data or use a pivot table.
Comments
0 comments
Please sign in to leave a comment.