
Sometimes, you may wish to design a process that zips up multiple files and outputs this final .ZIP file. Alternatively, you may need to upload a .ZIP file.
This may happen, for example, if there are a variable number of files to be uploaded to/outputted from the process. In these cases, you will need a step that is able to zip/unzip files.
This can be done by using external software in the Run Generic Executable action step in SolveXia.
In this example, we will use 7-Zip. However, you may follow similar steps for other software.
Also, the example will zip up files, however, similar steps can be followed to unzip an inputted ZIP file.
Steps
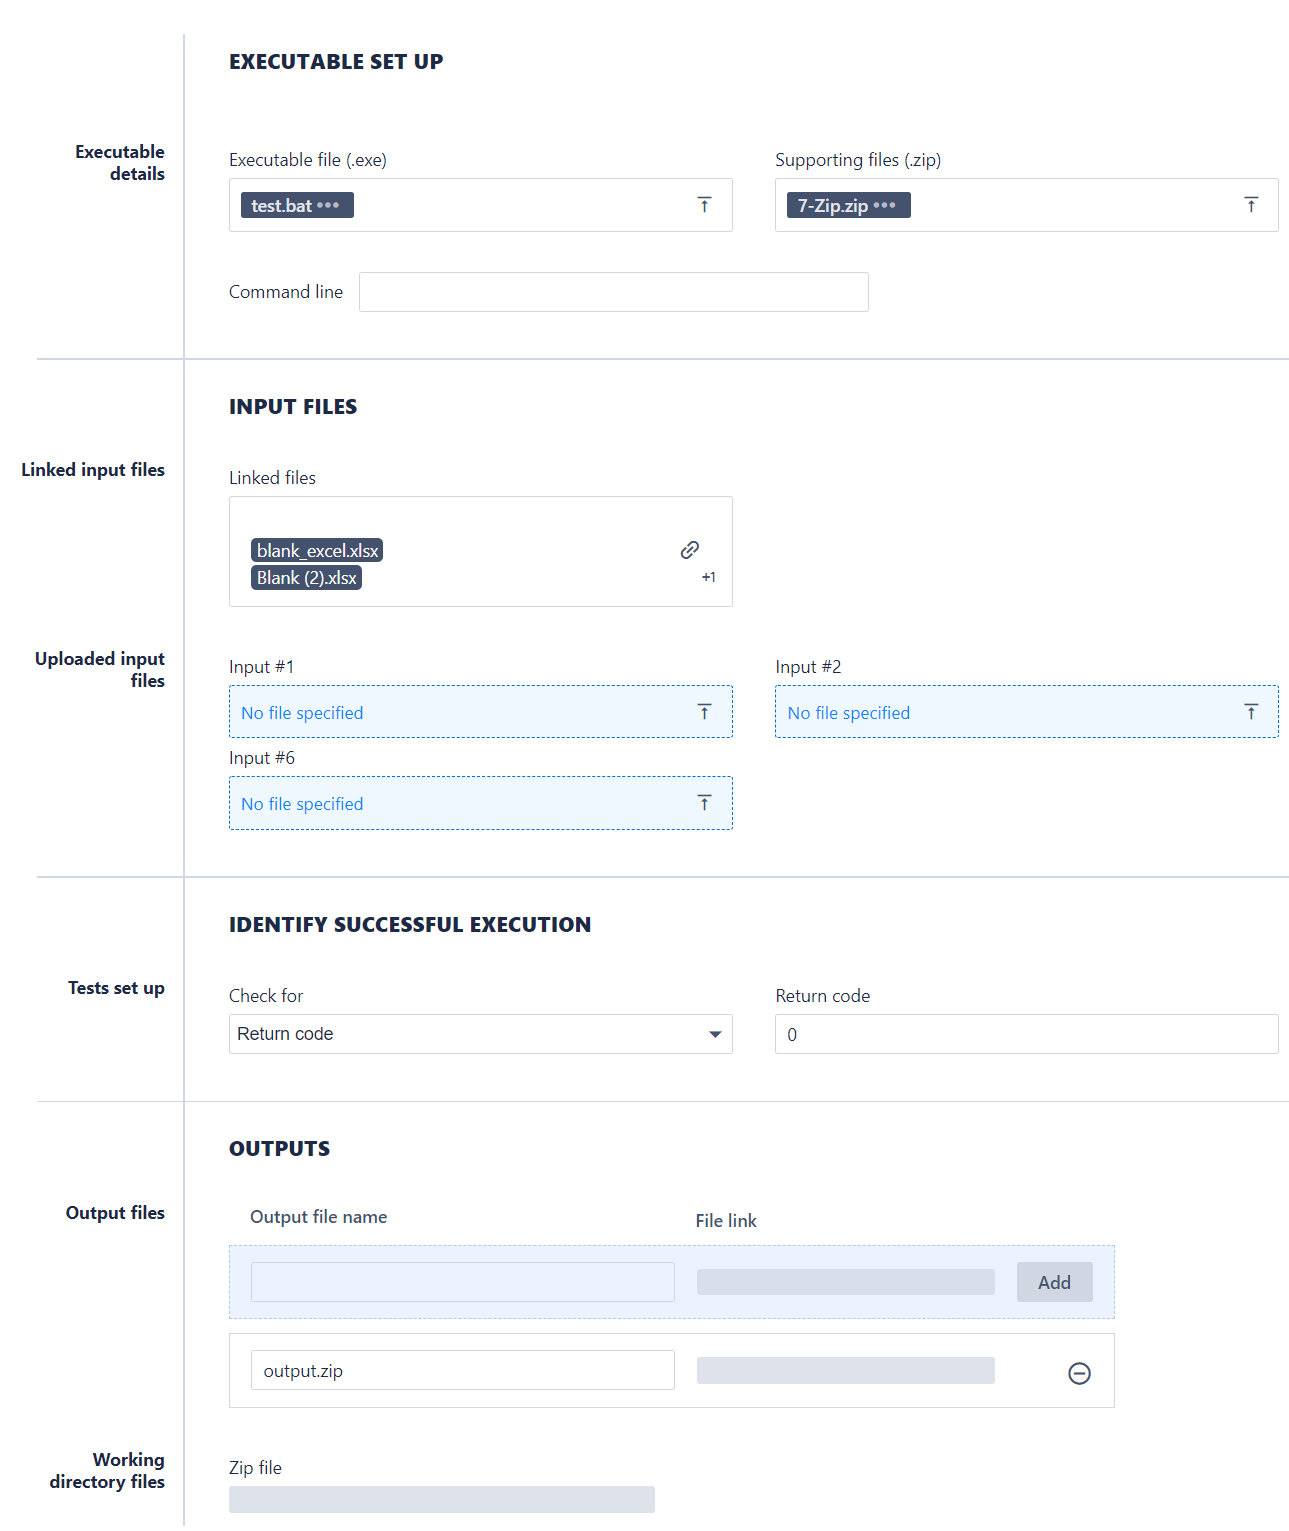
1. Firstly, you will need to create a Run Generic Executable action step in a SolveXia process.
2. You will need to then download 7-Zip from the website. Please note where it is downloaded, as we will need it for the next step.
3. Next, navigate to the location where 7-Zip is saved on your local computer. For example, on a PC, the file path could be: C:\Program Files\7-Zip, however, this may vary.
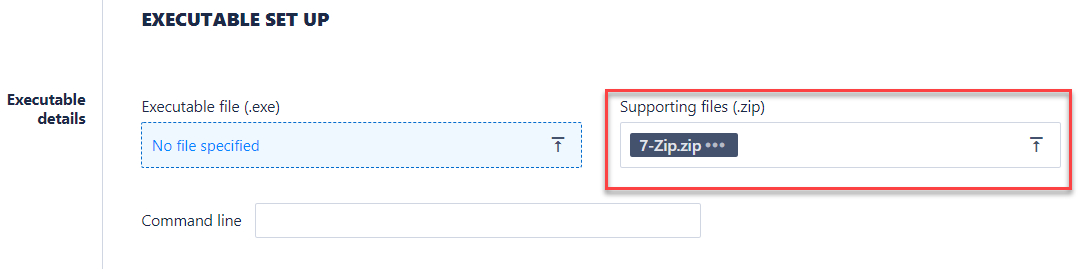
4. Zip up the files in this folder and upload this to the "Supporting files" property:
6. We will now need to link the relevant files in the process that you wish to zip, by linking these files in the "Input Files" section:
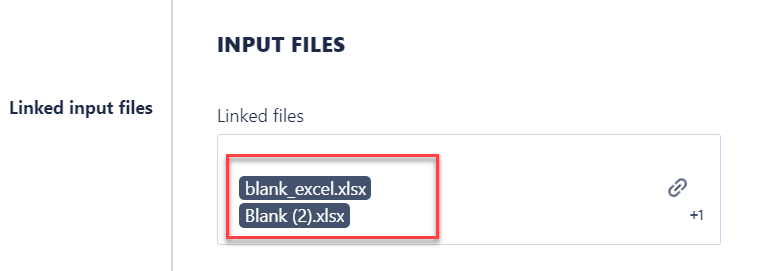
In this example, we wish to zip up these .XLSX files.
7. We will now need to write short .BAT file to run the command to zip the files.
8. To do this, open up any text editor (like Notepad) and write the following command:
7z a "output.zip" *.xlsx
and save the file as test.bat
This command (in bold) will zip up all .XLSX files into a ZIP folder called output.zip.
(Note: that in this example, we wish to zip up all .xlsx files. However, you can change the command to whichever file extension you wish)
For more info on how to modify this command for your own process, please refer to the Command Line User Guide for 7-Zip at https://sevenzip.osdn.jp/chm/cmdline/syntax.htm
9. Upload this file (test.bat) into the first property (executable file).
10. Set the return code to 0 in the "Identify Successful Execution" section:

11. Finally, enter the name of the output zip that you wrote earlier in the command in step 8, in this case, output.zip. Then click the Add button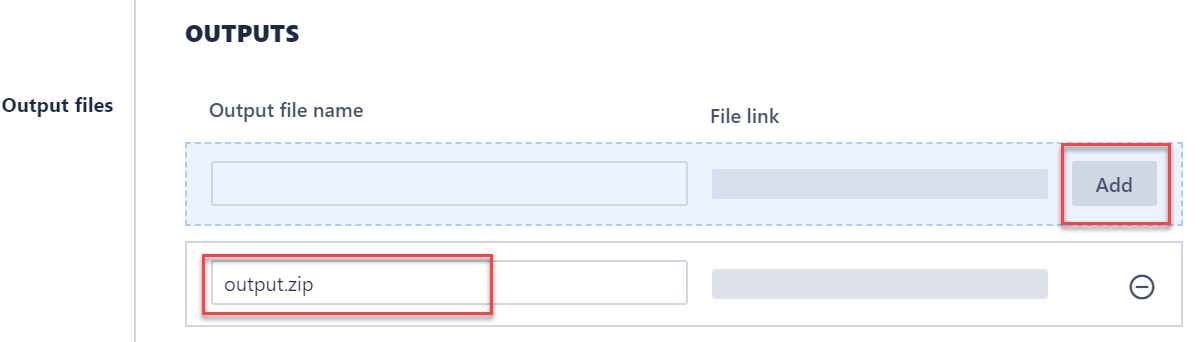
If you have followed these steps correctly, you should be done!
Comments
0 comments
Please sign in to leave a comment.