
The Delete rows selectively instruction can be used to delete rows from a data range, depending on a value(s) located in a specified column(s). This instruction can be perfect to clean up raw data.
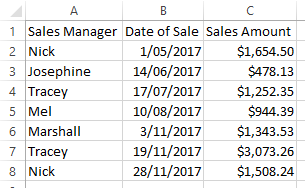
For example, consider the following raw and "uncleaned" data, where the Sales Amount is always expected to be positive.
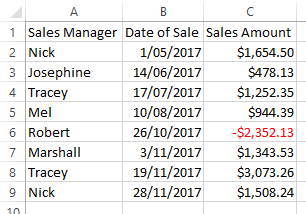
There are negative Sales Amounts in the data set and we wish to delete these records.
Step-by-step guide
1. Create a data step and upload the data.
2. Create an action step to manipulate data.
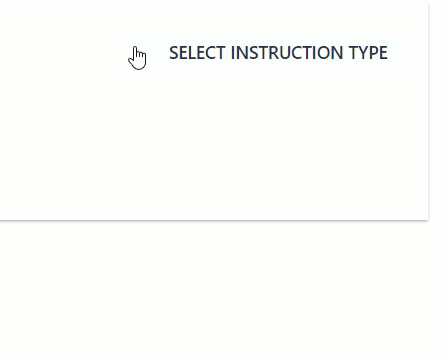
3. Select the Delete rows selectively instruction.
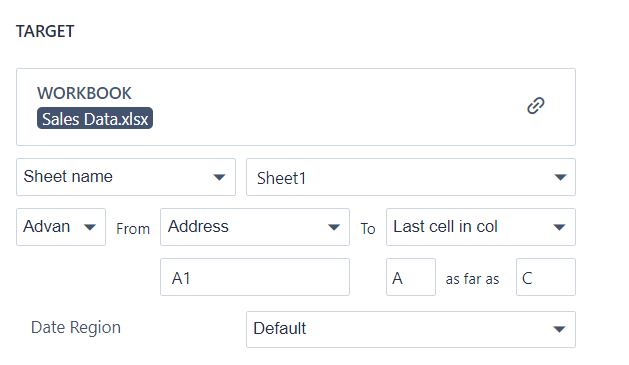
4. Configure the target range to select the data set.
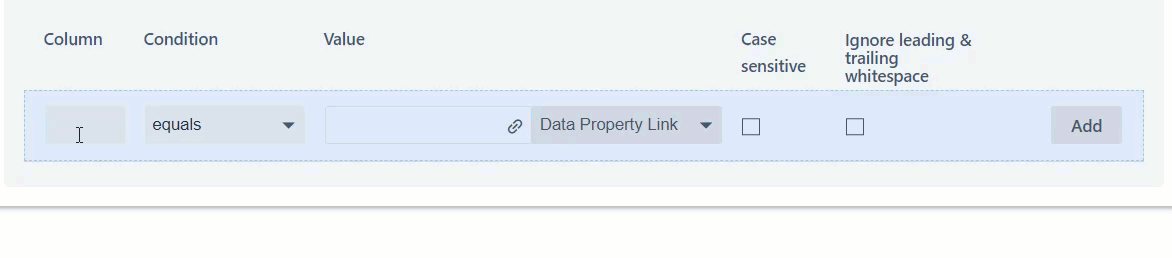
5. Enter the condition(s) on which a row will be deleted and click "Add".
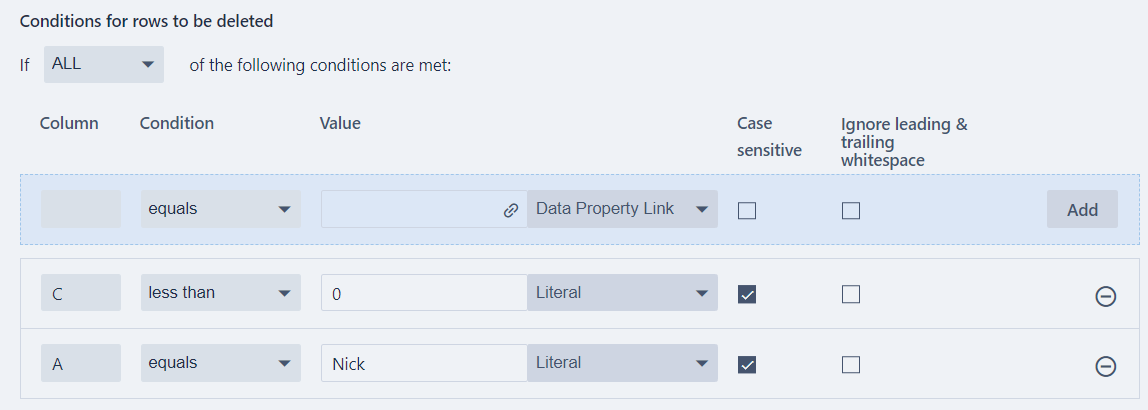
In the following example, rows will be deleted on the condition that the value in column C is less than '0'.
7. Click "SAVE" and run the step.
Once this step completes successfully, the appropriate rows will have been deleted.
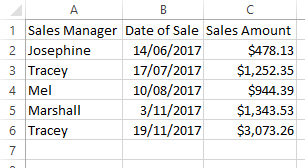
This data set now no longer contains records with negative Sales Amounts.
Multiple conditions
In the Delete rows selectively instruction, you can specify more than one condition to be met, in order for a row to be deleted.
1. To add more conditions, fill the condition in the template row (the first row with the blue background colour) and remember to click "Add" after entering the condition (as seen in step 5 in the previous section).
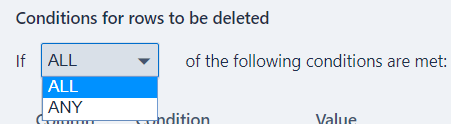
2. In the case of multiple conditions, select whether you want ALL or ANY of the conditions to be met for the rows to be deleted.
- ALL: all conditions you enter must be satisfied for the row to be deleted
- ANY: at least one condition you enter must be satisfied for the row to be deleted
For example, suppose we no longer require Nick's sales performance in the data set.
- Two conditions are specified and we choose to meet "ALL" the conditions for the row to be deleted
This will provide the following output.
Useful tips and resources
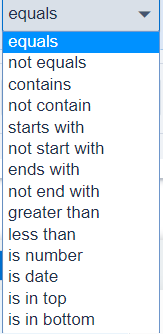
- The conditions in step 5 can be generalised into different operators. For example, we can use a wide range of various operators including the below options.
- Users can choose to fix their conditional value (select "Literal") or set it to vary depending on a property elsewhere in the process (select "Data Property Link").
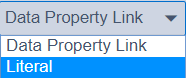
- For those who select "Data Property Link", instead of writing a literal value in the text box, you can link the value to a data property that contains a variable value
![]()
- When specifying a condition, the text can be toggled using the tick-box, depending on whether case-sensitivity is desired or leading & trailing whitespace can be ignored.

The file containing the example used in this article can be downloaded below.
Comments
0 comments
Please sign in to leave a comment.